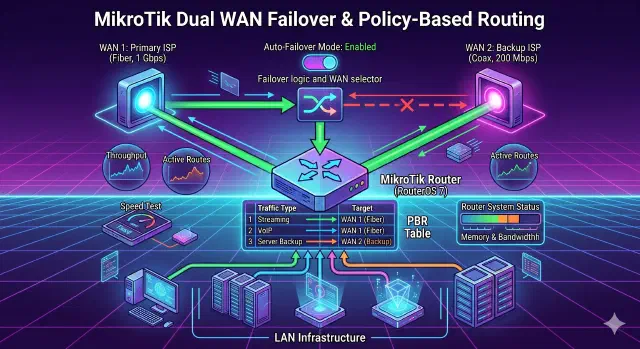
Setting Up Swap Memory on a Separate EBS Volume (Amazon Linux 2023)
Add swap to your EC2 instance without touching the root volume — here's how to set it up on a dedicated EBS volume with Amazon Linux 2023.
Running out of memory on a small EC2 instance? Adding swap on a separate EBS volume is a clean way to handle it without resizing the root disk. Keeping swap on its own volume means you can detach, resize, or snapshot it independently from your root filesystem. Here’s how to do it on Amazon Linux 2023.
Prerequisites
- AWS CLI configured with the right profile
- A running EC2 instance
- SSH access to the instance
1. Find Your Instance’s Availability Zone
EBS volumes are tied to a specific AZ, so your swap volume must be created in the same AZ as the instance you want to attach it to. Run this to find out where your instance lives: